Sam's Proper MX-3 - LT Turbo project *Parting out*
-
Currently sitting -90mm up front and -110mm in the rear.
4 New Goodyear Eagle F1's being fitted this Thursday, decided to drop down a profile to 45 to get a little more stretch so hopefully It don't rub with the new summer ride height.
-
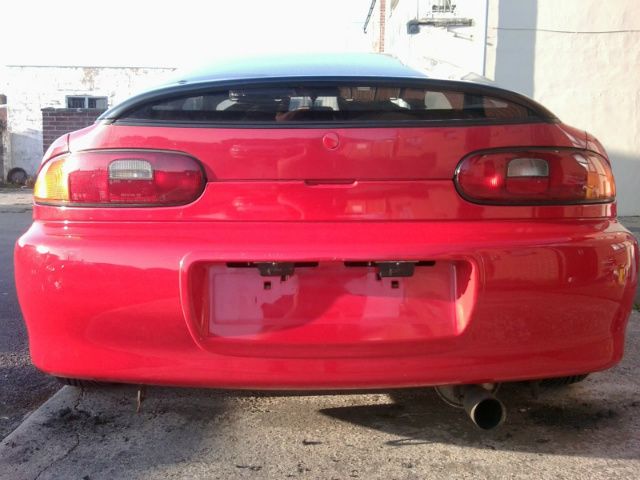
Big up respect going to Marco for sending Me His bumper which arrived in great condition due to His great packaging skills, and Im very pleased with it overall too :D
Spent an hour and nearly a hole can of TF-90 removing the old sticky tape and residue so I could use my import size plate on there.TF-90 is the don for this kind of the thing, the trick is to remove residue when the solvent is wet using a plastic scraper (This stuff drys within 3 or 4 secs. so you got to be quick)
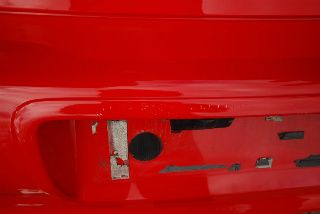
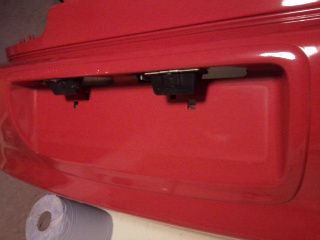
Will try and rope the wife into help me fit it this weekend 8)
-
Had the 195/45/15 Goodyear Eagle F1's fitted and wow what a tyre :D grip is outstanding and road noise has been reduced along
with improved ride quality. Little bit more of a stretch but not as much as I was hoping so the rears are still going to need some camber so Im going to do it the right way with camber plates in the future.Will drop the front down another 30mm or so intime just waiting on the new sump as I really want a guard as it will be sooo close the ground.
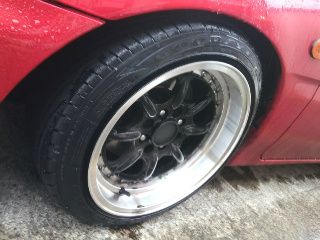
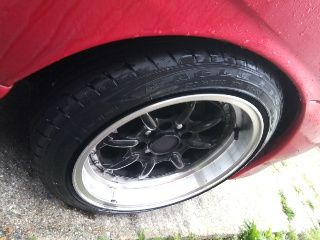
Changed the lugs nut to gen. chrome mazda type as Im losing all the green even in the engine bay, just going back to my orig. plan
of OE black looking silicon hoses throughout, will post pictures when completed.
-
@a83aa91e80=youdirtyfox:
Im losing all the green even in the engine bay, just going back to my orig. plan of OE black looking silicon hoses throughout, will post pictures when completed.
This saddens me :(
Whats with the change? I loved the bright lively theme you have going
-
Well I originally wanted an OE polished looking engine bay but I tried something different and it didn't really work together with the red,(red+green=christmas,lol) would be ok on a white/silver/black car but red is a tricky one as the only colour you can use is blue/purple, red or black and I only want to stick to one colour now that being black hoses, red spark leads and polished or powder coated chrome metal work, I think it will gel alot better together and look alot more classy showing all the polished pieces off :D
-
Ok so new universal 4 wire lambda sensor fitted. Why pay £50+ on a sensor with a plug when you can splice your own plug onto a new sensor for £15 and a bit of time (has to be crimped not soldered) Here is the relevant info for anyone wanting a new one.
@61fa0704d9:
This is a 4 Wire universal sensor for a Petrol Engine. The best way to determine if it will fit your car is to count the number and colours of the wires on your existing sensor. Basically, if your existing sensor has the same number and colour of wires 2 White, 1 Black and 1 Grey in this case, then you can be 95% certain that this sensor will do the job. For the more technically minded this is a Zircona type sensor .The thread size is 18mm and the spanner size is 22mm. This sensor will not replace “Titania” or “Planar” type Sensors.
Easy really what confused me at first was which way the two white wires go round but these are only +ve and -ve for the sensor heater and are dual polarity so it doesnt matter which way round :)
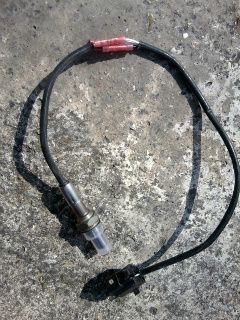
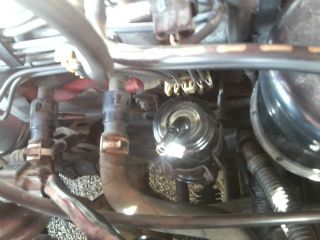
Bit of heatsheild over the crimps and your done ready to refit, found it quite easy to remove the old sensor after the exhaust had been warmed up a bit.Next onto a new fuel filter! I depressurized the system by removing the ENG INJ 30a fuse in the engine bay fuse box and gave it a few turns over.
For making this job easier I would recommend a flexible hose clip driver with a 7mm socket for the hoses and a 10mm ratchet spanner to release the fuel filter bracket, managed to change filter without jacking up or removing the battery was a bit of a faff around but hopefully I might have improved my MPG a little bit now….
-
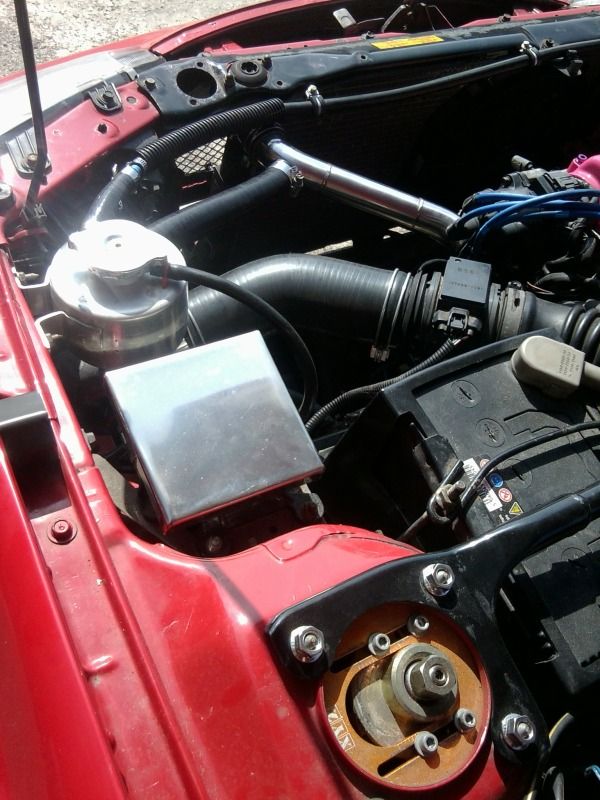
Spent the morning fixing the broken expansion union on the rad so I drilled it out and inserted something a bit more hefty and epoxied in place, fingers crossed it holds!
Also while rad was out swapped out all the green hoses to black.
-
looking good sam looks very tidy :D
-
Cheers Fella , still along way to go though :D
MOT next month Had to find a station with a flat drive on ramp as I wont get on normal ones now! Then im going to try and slot the rear hub holes for a bit of negative camber and tuck some tyre :bigok:
-
Did you sort your rpm gauge ? Thought It may be a mot issue ?
-
No still not done that yet! Have spotted a full set of 1600 clocks so I might go that route instead of having to resolder PCB's etc…
.. Not sure its a fail it does kinda move still just not very smoothly.
-
Amazing what I can do in the evenings now the clocks have gone forward plus working 7-4 most days now :D :D :D
Marco's Scarlet bumper now on 8)
-
Good work :) looks well. And x2 clocks in proper time again and sunny weather!
-
Cheers Bro tis funny that the work guys thinks it a different style bumper! looks more robust being all shiney and that.
Got out in the blaze again this afternoon to fit the new water bottle… If in doubt zip tie it out
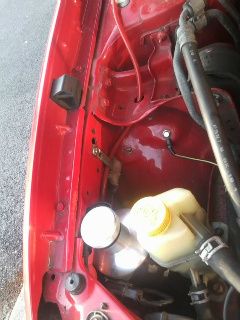
Still a bit skethcy on the workings of the PS res bottle think that needs more work internally so wont fit that just yet.
-
Looking good man, hope you're going to tuck and smooth the bay when you're finished, will look a treat :)
-
Cheers mate yeah a T&S bay would be flippin sweet :D Lot of work though and I've got quite a bit to do already, so we shall see….
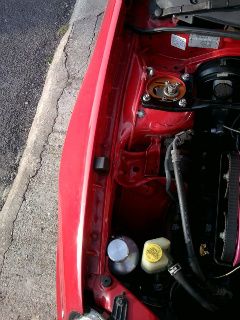
Did a small amount of tucking though by folding those white relays up behind the bodywork, plugs in the far corner by the brake servo got tucked back in and also lowered the brake servo hose down along with the wiring for the wiper motor out the way, so the whole rear edge of the engine bay is clear now and moved the earth to round by the headlight.
-
Have picked up an Intercooler I think will work and fit into the gap behind the bumper with both outlets out the same side ( they will need some slight modding though)
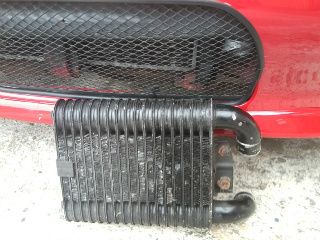
and this very special piece of pipework to connect it to the TB

-
If you want a small intercooler like that sam the audi a4 petrol turbo has one that slides in front of the wheel arch liner on the passenger side, it would probably do the same on the MX if you moved the washer tank
-
Nah the intercooler needs to sit in direct airflow so it will be positioned infront of the radiator behind the grill , tis the whole reason Im using that smaller width radiator so the boost pipes will go past it.
You can have a chargecooler in the engine bay as that works using water to cool the boosted charged air, but requires pumps/tanks and all sorts..
I will check out the Audi though thanks.
-
What a great start to the Easter bank holiday weekend! My car is now being featured in a JDM Euro stance blog :D :D :D
http://r32taka.com/2012/04/06/the-rare-mazda/#more-6862
..and to finish it off went straight through the MOT :cheers: